Pages

Thursday, April 27, 2017

Analog to Digital with Roaring Spring Whitelines Notepads

As much as I love my digital tools, there are times when I need to set them aside and use pencil, pen and paper. It was about a year and half ago that I started to use pencil and paper, which resulted in me going down a real creative path and producing a wild number of info-graphics using the Wacom Bamboo Slate. Using the Wacom Bamboo Slate and Bamboo Paper on my iPad I was able to create a work flow that let my creative forces thrive. There are those times when I need to step away from my digital tools and remember what it is like to hold a pencil or pen to paper without the distraction of the computer. 

So now when I need to reflect on my projects or ideas, I just sit down with pen and paper and begin to draw or write down my ideas. Using pen and paper has freed me to release my creative energies! But what could be better than to marry the analog with the digital when I need to file these ideas? This is where the Roaring Spring Whitelines notebooks come in. The Roaring Spring Whitelines notebooks come in various sizes but are distinctive in that they have a grey background with four unique icons in each of the corners of the paper. At the bottom of the page you will also
find three icons for Email, Evernote, and Dropbox that you can tick, which when used with the Whitelines app (for IOS & Android) can quickly file and transfer your notes to the respective service. Once your files have been transferred you will also note that the grey background lines or grids are gone an all of your work is highly visible on your device. Marrying the analog with the digital just got a whole lot easier using Roaring Spring Whitelines notebooks. Give them a try and let me know what you think! 


Read More »

Tuesday, March 28, 2017

Maximizing your Teaching in the Classroom with MindMeister

During my career as a professor and assistive technology consultant which has spanned over 30 years, I have seen the many benefits of providing students with visual and graphical supports to help them understand material. As much as students have benefited from the use of mind maps and graphic organizers, I would have to say that if anyone has derived benefits from  using these tools, it has been me. Early on in my teaching career, as a Professor of Education, I needed to come up with a strategy to deliver content to my students in the classroom that could provide a quick way to attach documents, notes, and links to web sites. As I was reflecting on this need, I quickly realized that I could use MindMeister to help me organize my in-class lectures and resources. MindMeister could provide me with a very fluid and powerful way to organize my lectures and provide my students with the resources that they would need for class.

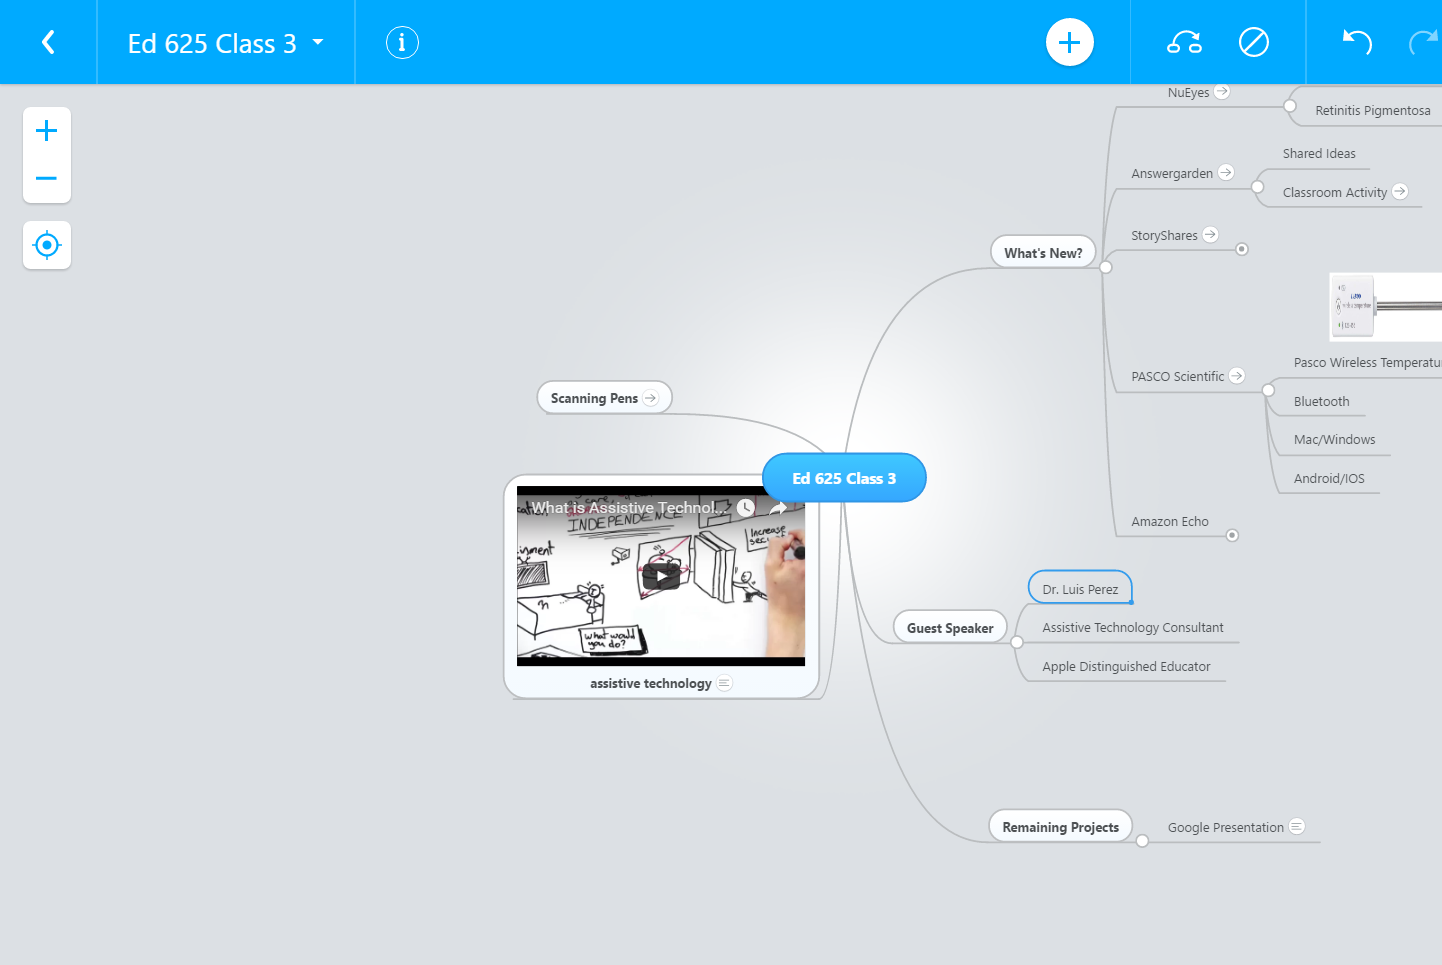
MindMeister provided me with a set of tools that would make the planning for my classes a whole lot easier. Starting out with a basic mind map I was able to structure the map with the material I would be presenting for the class. Using a mind mapping application like MindMeister gave me a way to quickly see how all the elements of the lesson came together for the class. More importantly, MindMeister has a host of time saving features which made the process of putting my lessons together a breeze. Since I am teaching educational technology courses and do a great deal of hands on with my students, being able to load my MindMeister mind maps with links to web sites has proven to be invaluable. Using the Wunderlink feature has saved me a great deal of time. I simply have to type the topic into the mind map and click on the Wunderlink icon to have MindMeister  suggest the website link. Using the Wunderlink feature has saved me countless hours of having to look up the website address. Prior to class, I link or embed the MindMeister mind map in our Learning Management System (Moodle) and when students come to class they can simply open the mind map, and click to go out to the web site when we are accessing it in class. Since
Ed_625_Class_3 (1).jpg
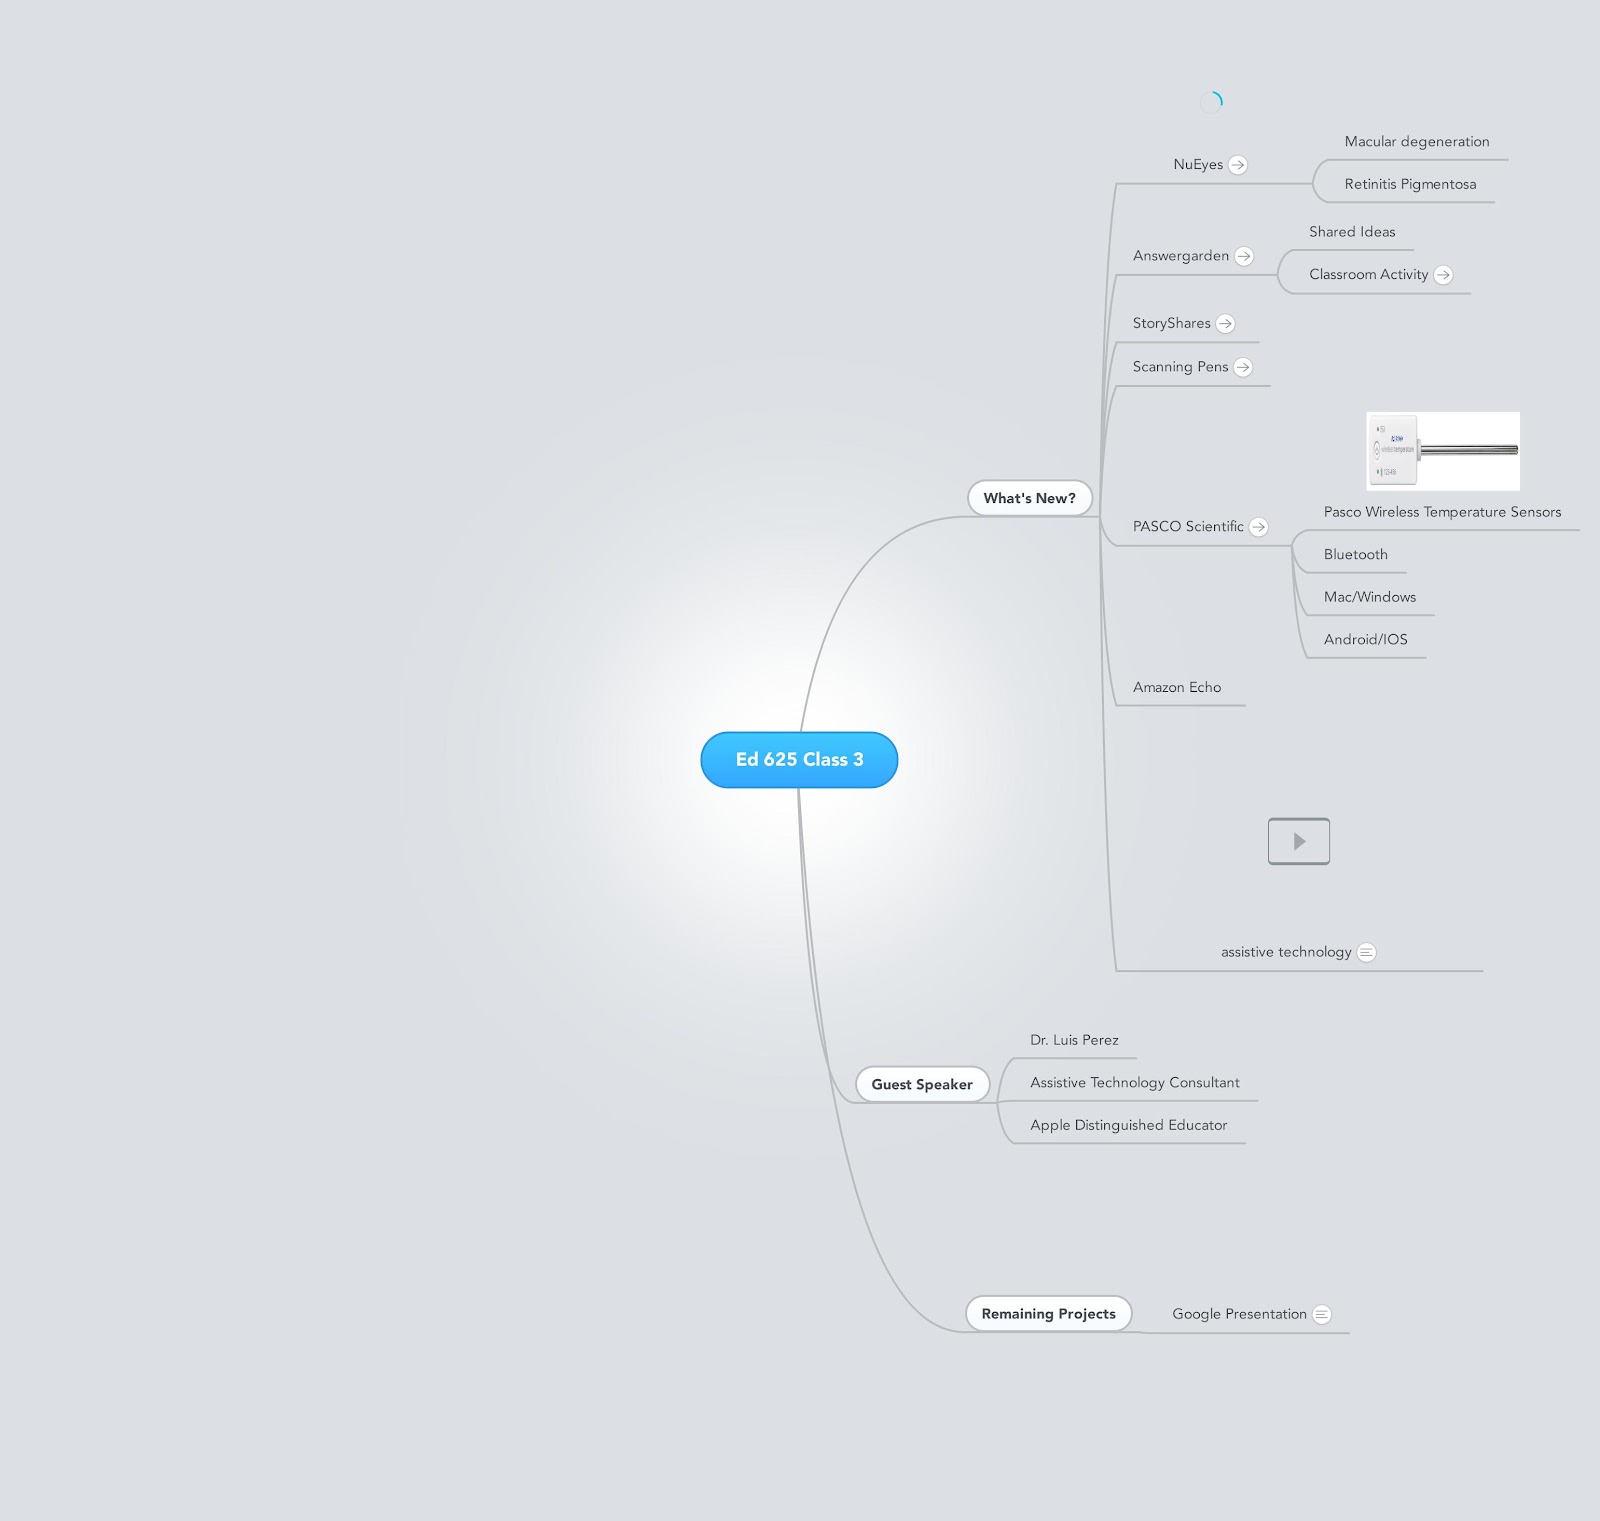
MindMeister  is web based any changes I make to the mind map are automatically updated which makes it an ideal learning tool. When I am in class I simply open the MindMeister  map and go through my lecture with all my resources attached to the map.

In addition to linking websites, I often take advantage of MindMeister’s capability of accessing YouTube videos which I can embed right within the map. Being able to search for YouTube videos right within MindMeister is another time saving feature when designing my lectures.

Of course if it only had these aforementioned features that would be enough to get through my classes, but with the ability to attach documents and have student comment on the material it makes MindMeister and indispensable learning tool in my classroom. One of the big advantages of using MindMeister in this way, is that from year to year, I can tweak the lecture maps and quickly update them with new websites and resources and I am up and running for the next semester. If you are teaching and have to organize your lectures for students then you should really take a look at how MindMeister can help solve your problems of delivering content and resources.

If you liked this article, you might also be interested in:

Read More »

Sunday, March 26, 2017

New Infographic Guides Available With Focus on Educational & Assistive Technologies

For the past 6 months I have been using the WACOM Bamboo Slate and iPad to create info-graphics for many of the assistive technologies that I have been using with students. What started out as a just a way for me to explore some new gadgets quickly became an enjoyable activity for me at the end of a busy day. In the evenings, to relax, I will take out my Bamboo Slate and using a mechanical pencil begin to draw a screen shot or gadget and then ink it with the Bamboo pen. Once the drawing is inked, I send it to my iPad and begin to color it using the Bamboo Paper app.


I have to tell you that I find it very relaxing creating these info-graphics and there is something engaging about drawing the images. I have received a great deal of positive feedback and some educators have approached me about wanting to purchase them for classroom use. I am in the process of putting together a list of the info-graphics that I have created and will be offering them laminated for easy reference and use. The info-graphics cover a wide array of apps and hardware and are a easy to use quick reference which would be ideal for classroom teachers or students taking courses in educational technology and special education. I am working on the pricing but am trying to keep the costs down so that I can this information into the hands of teachers, students, and parents. I should be able to create the info-graphic guides so that there are 2 guides in a heavy lamination for ease of use. The info-graphic guides can be three holed punched so that you can keep them in a binder. The laminated guide which would consist of two different but related info-graphic guides are $10 dollar each. Single page info-graphic guides would run $5.00. Volume pricing is available.

Here is a partial list of some of the guides that are now available.

Getting Started with Voice Typing
Using Voice Commands with Voice Typing
Using Popplet 
Using the C-Pen Scanning Reader Pen
Using Word Online with Immersive Reading
Using WordQ for Chrome
Using ThoughtQ for Chrome
Getting Started with Co:Writer Universal for Chrome
Using Flipgrid in the Classroom
Using Sonocent Audio Notetaker
Getting Started with Snap & Read for Chrome
Tips on using Read & Write for Chrome
Getting Started with ClickerDocs for Chrome
Using the Amazon Echo in the Classroom
Using Livescribe Smartpens in the Classroom

Please feel free to contact me if you have any questions or want to customize a solution.


Read More »

Saturday, March 18, 2017

The C-Pen Reader Packs A Lot of Features in a Small Package

When I came across the C-Pen Reader at the FETC conference this past year, I knew that I had to request a review unit to test it out. After contacting the company, they approved my request and
C-Pen Reader
provided me a C-Pen Reader for the review. The opinions reflected in this blog are my own. I have been in the field of assistive technology for over 25 years and over these years have looked at a number of portable hand held reading solutions that promised to make the reading process easy and quick from scanning to reading text. 

The first time you pick up the C-Pen Reader you will be amazed by it size and weight (1.7 oz.) and a bright OLED 256 x 64 display. The C-Pen Reader packs a lot of technology into a rather small package making it easy to pack in your backpack or brief case. The C-Pen Reader comes with a Quick Start Guide which gets you up and running quickly. In the box you will find the C-Pen, a USB to Micro USB cable (for charging and transfring files), ear buds, and a protective carrying case. The C-Pen Reader was already charged right out of the box and so I jumped in and turned it on. Pressing the Power button started up the C-Pen Reader and now I was ready to scan some text. Gliding the C-Pen Reader across a line of text, you will begin to experience just how fast the text is scanned into the device. Within seconds the line of text was being read with highlighting by the C-Pen Reader using a high quality American English text to speech engine. Using the navigation buttons-students could go back and have the text re-read as they see fit. There are lots of ways to customize the reading experience by jumping into the Menu system to control the speed (Slow, Medium, & Fast) and volume. The C-Pen Reader has an 3.5 mm audio jack which enables students to plug in their ear buds so that they can use the C-Pen Reader in a classroom, discreetly. One
C-Pen Reader
of the problems that I often found using handheld scanning pens was that the scanning algorithms and the optical character recognition engines were rather poor which often resulted in devices speaking gibberish. This was not the case with the 
C-Pen Reader-the scanning was fast and accurate making it a pleasant reading experience. As long as you have a steady hand you will find the accuracy to be excellent. The C-Pen Reader can be set up for Right or Left handed scanning making it easier to customize the scanning direction resulting in a better experience. The C-Pen Reader also has a built-in dictionary (Collins 10th Edition) support allowing students to scan and look up words they are unfamiliar with. 

The C-Pen Reader has a number of other features that allow students to use the device as a voice recorder for creating voice notes in a MP3 file format that can be listened to and managed on the scanning pen. The C-Pen Reader comes with 1 GB of storage so there is plenty of room to store audio and voice notes. This feature can come in handy for students who need to record their ideas or lectures and then transfer them to their computer. When the C-Pen Reader is plugged into a Mac or PC it mounts as a drive, making it easy to transfer audio and text files. 

Students may also find using the C-Pen Reader useful as a means to scan text from articles and books directly into a word processor. By plugging the C-Pen Reader into a computer, you can put it into a keyboard mode which inputs any text you scan directly to the application that is open. Students will find this a great feature when they need to do research or to place the text into a word processor with Text-To-Speech capabilities. Teachers can also use this feature to pre-scan text into a File on the C-Pen Reader device that the student can open when they need access to the text in the classroom.

The C-Pen Reader packs a lot of features into a small package that students will find easy to navigate. For students that have been diagnosed with dyslexia or a reading disability the C-Pen Reader offers a great portable reading solution. The C-Pen Reader offers students a way to access text in a small discreet package that can be easily used in the classroom. I would see this an ideal solution for students who need to access tests, worksheets, and short reading passages. The C-Pen Reader gives students the opportunity to access text independently in the classroom with a light and powerful tool. In future releases I would like to be able to change the size of the font that is displayed on the C-Pen Reader and for classroom use it wold be great if teachers could manage a set of these devices that would enable them to easily pre-load text into a classrooms set of C-Pen Readers. For more information about the C-Pen Reader click here. 


Read More »

Monday, January 23, 2017

Betabook- Portable Whiteboard to the Rescue!

Sometimes you just scratch your head and say, "how come I didn't think of that?" That's what I said to myself when I received the Betabook to review. The Betabook is a
portable whiteboard bound between two covers to resemble a book. I received the small A4 Betabook with a black marker and fleece eraser to try out. For the past year I have really delved into sketchnoting and thought that I would give the Betabook a try. The Betabook is extremely portable and you would hardly know it was in your bag to carry it. Owing to the fact that it is an analog device-it is extremely easy to use, just open the Betabook take the cap off of the supplied dry erase marker and you are ready to go. The whiteboard surface is smooth, bright and easy to write on, with the fine point dry erase marker. I did go out to Staples and purchase a set of multi-colored dry erase markers to supplement the black marker that was included. The colors looked great on the Betabook and when it was time to erase the whiteboard the fleece eraser worked well. Throwing the Betabook in my bag reminds me how freeing analog tools can be. No worries about having to charge the device and with my iPhone it is easy to snap a shot and share my ideas with others. If you are a visual thinker and like sketchnoting or whiteboarding and have always yearned for a portable solution here it is.
For those of you that need more real estate you can purchase the Betabook Pro which is an A3 size. For me the A4 size works well and barely takes up any room in my backpack which is great! For more information please go to Betabook.
Read More »

Thursday, December 22, 2016

Creating Infographics with Wacom Bamboo Slate & Bamboo Paper

If you have been following me on Twitter (@assistivetek) or Instagram (@assistivetek) you will have noticed that I have been creating infographics on a number of different educational hardware and software. Some of you have emailed me and asked me how I am creating these infographics, which I would like to share with you. About 6 months ago, I was sent by WACOM a Bamboo Slate (A4) to review, which opened the door to my flight of infographic ideas. The WACOM Bamboo Slate is a hardware device that captures everything you write on a paper pad with a a ballpoint pen that comes with the device. Once you get your ideas down you sync the device over Bluetooth to your IOS or Android device to Inkspace, the WACOM tablet app. Once your ideas and drawings are in Inkspace 

Inkspace
you can then export your drawings to a variety of different formats for further editing.The  WACOM Bamboo Slate marries the best, of being able to use pen and paper for creation and then store and manipulate the drawings using digital tools.

Using ScreenBeam Infographic
While not an artist, I have always enjoyed doodling with pen and paper and using the WACOM Bamboo Slate really felt comfortable for me to create my infographics. As part of my process for creating my infographics, I typically use a Uni Kuru Toga mechanical pencil to rough out the images and text on the paper. Once I am happy with the results, I bring out the WACOM ballpoint pen and begin to trace over the pencil renderings which ensures that the drawings come out just right. Once the drawing is complete, I sync the image from the WACOM Bamboo Slate to my iPad using the Inkspace app. Once the drawing is in Inkspace, I then export it using the WILL format (Wacom Ink Layer Language) to Bamboo Paper. Using the various painting tools in Bamboo Paper and the WACOM Bamboo Fineline stylus- which works effortlessly with Bamboo Paper gives me the drawing control that I need to complete the infographic. Once I have completed the infographic I can quickly export the drawing out of Bamboo Paper directly into Twitter. 

I would be interested in learning what type of infographics you would like to see and if you are creating some yourself how are you creating your infographics?


Read More »

Monday, July 11, 2016

Co-Teaching and Technology: Enhancing Communication & Collaboration- Just Released!

With the expansion of co-teaching as a means to improve student outcomes, technology can be an invaluable resource.  Co-teachers need to plan collaboratively, jointly implement lesson plans, and cooperatively assess student progress.  This reference guide provides practical  strategies on how technology can facilitate co-planning, expedite sharing of student data, and streamline many other tasks that ultimately assist in accomplishing co-teaching's goal: improved student outcomes. Whatever your preferred computer platform, co-teachers can apply these
strategies and applications to accommodate all learners' needs.

Written by the nation's foremost authority on co-teaching, Marilyn Friend, and Brian S. Friedlander, an expert in the use of instructional and assistive technologies, this handy tool features an overview of co-teaching fundamentals, along with recommendations of over two dozen free and low-cost applications and programs for
  • Expediting co-planning
  • Improving communication
  • Streamlining data collection
  • Augmenting assessment
  • Simplifying data analysis
  • Creating guided notes
  • Facilitating differentiated instruction
  • Increasing student engagement
  • Enhancing note-taking skills
  • Implementing electronic scaffolding

To order your copy- please contact Brian - Volume pricing is available and School Purchase Orders are Accepted. This 6 page guide makes for a great professional development hand-out! Order your copy today!


Read More »